I. Introduction
Have you ever missed capturing a perfect moment because you were trying to fit everyone in the picture or you were not quick enough to press the shutter? The time has come to stop missing out on the picture-perfect moments just because you couldn’t take the shot in time. Apple’s iPhone camera comes with an amazing timer feature that allows you to capture the moments you want, effortlessly.
This article will guide you through the step-by-step process of how you can set a timer on your iPhone camera and use it to capture beautiful shots. Are you ready to dive into the world of photography and start making those picture-perfect moments count? Let’s get started.
II. Step-by-Step Guide to Setting a Timer on Your iPhone Camera
Setting a timer on your iPhone camera is easy, and this step-by-step guide will make it even simpler. Follow these instructions closely, and you’ll be setting timers on your iPhone camera like a pro in no time:
1. Open the camera app.
2. Look for the timer icon on the right-hand side of the screen and tap on it.
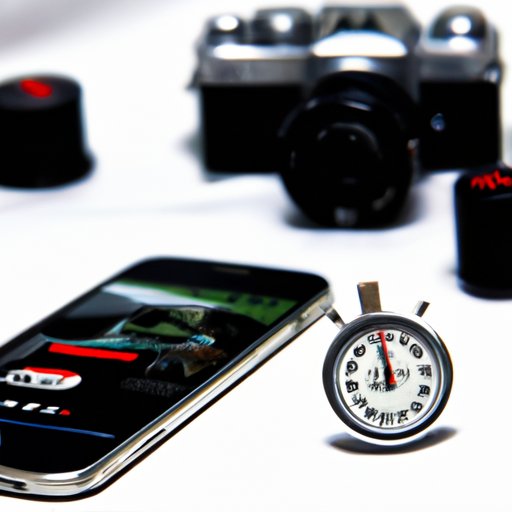
3. Choose the time duration you want the timer to last. The options available are 3 seconds and 10 seconds. Once you’ve made your selection, the countdown will begin.
4. Once the countdown has started, position yourself or your subject as desired and get ready to snap the picture.
5. The camera app will take the picture once the countdown timer has ended.
It’s as simple as that. With these five steps, you’re on your way to taking stunning pictures without breaking a sweat.
III. Capturing The Perfect Shot: A Beginner’s Guide to Setting a Timer on Your iPhone Camera
The timer feature on your iPhone camera can help you take stunning photos, even if you’re new to photography. Here are some tips and tricks to use the timer feature to capture picture-perfect moments:
– Use the timer feature to take a picture of yourself without holding the camera. This is especially useful when you want to capture your beautiful smile or outfit without the awkwardness of holding your phone.
– Use the timer feature to take a group photo. It can be difficult to fit everyone into the frame when one person is taking the picture. The timer feature will give you enough time to position yourself in the shot, ensuring that everyone is in the frame.
– Use the timer feature to take pictures of moving objects. Sometimes it can be challenging to take a clear picture of a running child or a jumping pet. Use the timer feature to give yourself enough time to position the camera and capture the perfect shot.
The possibilities are endless when it comes to using the timer feature on your iPhone camera, so experiment and see how it can enhance your photography skills.
IV. Never Miss A Picture Again: How to Use Your iPhone Camera’s Timer Feature
The timer feature is not just a helpful tool – it’s essential when it comes to taking important shots. Here are some examples of situations where the timer feature can be your life-saver:
– Family gatherings or events such as weddings where you want to capture a group shot without leaving anyone out.
– Wildlife photography where you need to keep a safe distance from the animals or need to keep your camera as still as possible to avoid scaring them away.
– Capturing sports moments where a steady hand is critical, such as taking a picture of your child’s soccer goal or a gymnast’s perfect landing.
The next time you find yourself in any of these scenarios, remember to use the timer feature on your iPhone camera to capture that perfect shot.
V. Maximizing Your iPhone’s Camera: Setting the Timer in Five Easy Steps
If you’re looking for speed and efficiency when setting the timer on your iPhone camera, here’s a simplified version of the step-by-step guide:
1. Open the camera app.
2. Look for the timer icon and tap on it.
3. Choose the time duration you want the timer to last.
4. Position the camera and frame your shot.
5. Wait for the countdown to reach zero, and your picture will be taken.
To make the most of the timer feature, try these tips:
– Use a tripod to keep your camera stable when using the timer feature. A stable camera makes for sharper photos.
– Adjust the focus and exposure to get the best results from your camera.
– Make use of the burst mode to capture a sequence of pictures automatically once the timer runs out.
Avoid these common mistakes when setting the timer:
– Not allowing enough time for you or your subject to get into position before the timer runs out.
– Not using a stable surface or tripod, resulting in blurry photos.
VI. Picture Perfect: Setting a Timer for Your iPhone Camera Like a Pro
Professional photographers have mastered the art of using the timer feature, and you can too. Here are some advanced techniques for setting the timer on your iPhone camera.
– Use the burst mode to capture a sequence of pictures and select the best one later.
– Use the timer feature along with other camera tools such as HDR or Night mode to capture stunning images in any lighting condition.
– Try using the timer feature creatively. Experiment with different poses, foregrounds, and backgrounds to create unique pictures.
Accessories such as tripods, remote controls, and camera lenses can help you enhance your photography skills. These accessories are great tools to implement when trying to capture the perfect shot using the timer feature.
VII. Time is On Your Side: How to Set a Timer on Your iPhone Camera
The timer feature on your iPhone camera is now your best friend. You know how to use it, you know when to use it, and you know how to maximize its capabilities. To recap, here’s what we’ve covered:
– Setting a timer on your iPhone camera is easy, and it only takes a few steps.
– You can use the timer feature to take a group photo, take a picture of yourself, capture moving objects, or avoid missing out on important shots.
– There are tips and tricks that can help you make the most of your iPhone camera’s timer feature, and accessories that can enhance your photography skills.
Remember, practice makes perfect. Don’t be afraid to experiment and try new things with your iPhone camera’s timer feature.
VIII. Making Every Shot Count: A Tutorial on Setting a Timer for Your iPhone Camera
Just in case you need a quick reminder on how to use the timer feature, here’s a summarized guide:
1. Open the camera app and tap on the timer icon.
2. Choose the time duration you want the timer to last (3 or 10 seconds).
3. Position the camera and frame your shot.
4. Wait for the countdown to reach zero, and your picture will be taken.
The importance of using the timer feature in photography cannot be overstated. It helps you capture picture-perfect moments and allows you to enjoy the moment without worrying about taking the perfect shot. So go out there and start making every shot count.